GST registration is free, fully online, and done through the official GST portal at www.gst.gov.in. There is no government fee. In most cases, the process is fully online. However, in certain cases, biometric authentication or verification may require visiting a GST Suvidha Kendra.
Once approved, you get a unique 15-digit GSTIN (Goods and Services Tax Identification Number) and a Registration Certificate. From that date, you are authorised to collect GST from customers and claim Input Tax Credit on your purchases.
This guide covers the complete registration process for a Normal Taxpayer step by step, exactly as described in the official GST portal manual at tutorial.gst.gov.in.
Who Should Register for GST?
As per Section 22 of the CGST Act, 2017, registration is mandatory if your aggregate annual turnover exceeds the applicable threshold:
| Category | Turnover Threshold |
|---|---|
| Suppliers of goods only - Normal states | Exceeds Rs. 40 lakh per year |
| Suppliers of services or mixed supply - Normal states | Exceeds Rs. 20 lakh per year |
| Special category states (Arunachal Pradesh, Assam, Himachal Pradesh, Meghalaya, Sikkim, Uttarakhand, Manipur, Mizoram, Nagaland, Tripura) | Exceeds Rs. 10 lakh per year |
The following persons must register regardless of turnover:
- Persons making inter-state taxable supplies.
- E-commerce operators and persons selling through e-commerce platforms.
- Casual taxable persons.
- Non-resident taxable persons.
- Persons liable to pay under reverse charge.
- Input Service Distributors (ISD).
- TDS deductors (Government departments, PSUs).
- TCS collectors (E-commerce operators).
You can also register voluntarily even if your turnover is below the threshold. Voluntary registration is useful to claim Input Tax Credit and appear credible to business buyers who require a GSTIN on invoices.
Documents Required for GST Registration
The documents required vary depending on the constitution of your business. Here is the full list as per the official GST portal:
| Category | Documents Required |
|---|---|
| All applicants (mandatory) |
|
| Proof of Principal Place of Business |
|
| Proprietorship |
|
| Partnership Firm / LLP |
|
| Private / Public Limited Company |
|
| Hindu Undivided Family (HUF) |
|
| Bank account details (optional at registration) | Bank account details are not mandatory at the time of registration (w.e.f. 27 December 2018). You can add bank account details through a non-core amendment application after your GSTIN is granted when you first log in to the portal. |
File formats accepted: PDF or JPEG only. Maximum file size: 1 MB per document.
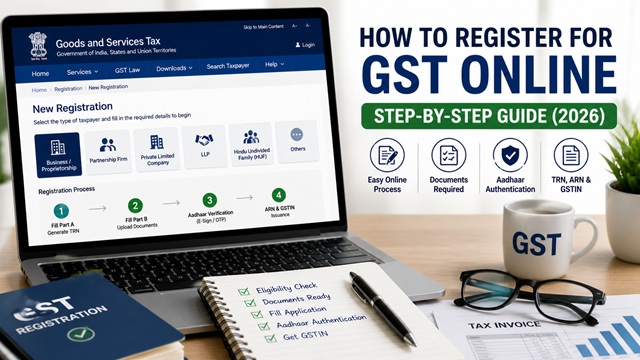
Registration Process Overview
The GST registration application is called Form GST REG-01. It is divided into two parts:
| Part | What You Do | Output | Validity |
|---|---|---|---|
| Part A | Enter PAN, mobile number, email. Verify with OTP. | Temporary Reference Number (TRN) - a 15-digit number | 15 days from submission |
| Part B | Log in with TRN. Fill 10 tabs with complete business details. Sign and submit. | Application Reference Number (ARN) | Until Tax Officer processes it |
Important: If Part B is not submitted within 15 days of generating the TRN, the TRN and all information entered will be permanently deleted from the portal.
Part A - Generate TRN (Temporary Reference Number)
- Go to www.gst.gov.in.
- Click Services > Registration > New Registration. Alternatively, click the REGISTER NOW link on the homepage.
- Select New Registration option on the page displayed.
- In the I am a dropdown, select Taxpayer.
- Select your State/ UT and District from the dropdown lists.
- Enter the Legal Name of the Business exactly as it appears in your PAN database.
- Enter the PAN of your business or proprietor. PAN is mandatory for GST registration.
- Enter the Email Address of the Primary Authorised Signatory.
- Enter the valid Indian Mobile Number of the Primary Authorised Signatory.
- Enter the Captcha and click PROCEED.
- The portal now shows all existing GSTINs, Provisional IDs, UINs, and GSTP IDs mapped to the same PAN across India. Click PROCEED. You can download these existing registration details in PDF format if needed.
- On the OTP Verification page, enter the Mobile OTP and separately the Email OTP received. Note: these two OTPs are different from each other. Each is valid for 10 minutes.
- Click PROCEED.
- The system generates a 15-digit Temporary Reference Number (TRN). It is also sent to your registered email and mobile number. The expiry date of the TRN is shown on screen. Note it carefully.
- Click PROCEED to continue to Part B immediately, or note the TRN and return within 15 days.
Part B - Fill the Registration Application
To access Part B at any time within the 15-day window:
- Go to www.gst.gov.in.
- Click Services > Registration > New Registration.
- Select the Temporary Reference Number (TRN) radio button.
- Enter your TRN and Captcha. Click PROCEED.
- Enter the OTP received on your mobile and email. Click PROCEED.
- The My Saved Application page is displayed. Click the Edit icon (blue square with white pen) under the Action column.
The Registration Application form opens with ten tabs that must be filled sequentially. A progress bar at the top shows the percentage of completion. Each tab turns blue with a tick mark when completed.
Tab 1 - Business Details
This is the first and most important tab. Fill in the following:
- Trade Name: Name under which your business operates publicly. Can be different from the legal name. You can add up to 9 additional trade names.
- Constitution of Business: Select your business type from the dropdown (Proprietorship, Partnership, Private Limited Company, LLP, HUF, etc.). This is validated against the CBDT PAN database.
- District: Select the district of your business.
- Option for Composition: Select Yes if you want to register under the Composition Scheme (available only if expected turnover stays below the composition threshold). Select No for regular registration.
- Date of Commencement of Business: Select using the calendar.
- Date on which liability to register arises: The date from which you became liable to register.
- If you apply within 30 days of this date, registration is effective from this date.
- If you apply after 30 days, the date of liability remains the same, but the effective registration date becomes the date the GSTIN is granted.
- Are you a casual taxable person? Select Yes only if you occasionally supply goods or services in a taxable territory where you have no fixed place of business.
- Option for registration under Rule 14A: Select Yes if your output tax liability is Rs. 2.5 lakh or less per month. Otherwise, select No. This field is mandatory - failing to select will result in an error.
- Reason to obtain registration: Select from the dropdown - options include Crossing Threshold, Voluntary Basis, Input Service Distributor, SEZ Unit, SEZ Developer, Corporate Insolvency Resolution, and others.
- Indicate Existing Registrations: If you had earlier registrations under CST, Central Excise, or Service Tax, enter those details here.
Click SAVE & CONTINUE.
Tab 2 - Promoter / Partners
This tab captures details of all stakeholders of the business. You can enter details of up to 10 Promoters or Partners.
For each promoter or partner, enter:
- Personal details: Name, DIN (for directors), PAN, Aadhaar number, date of birth, gender, designation
- Residential address (with map pin using the Map My India facility)
- Photograph (JPEG, max 1 MB)
- Identity proof and address proof document details
Map My India (MMI) address facility: The portal uses MMI to pin your address on a map. Enter your address or PIN code in the search box, select from the suggestions, drag the pin to the exact location if needed, and click Confirm.
Click SAVE & CONTINUE.
Tab 3 - Authorised Signatory
The Authorised Signatory is the person who will sign all GST filings and correspondence on behalf of the business. Enter:
- Name, PAN, Aadhaar, mobile number, email, designation, and residential address
- Photograph (JPEG, max 1 MB)
- Identity and address proof
Note: The Primary Authorised Signatory (PAS) is the person whose mobile number and email were entered in Part A. You can add more authorised signatories here if needed.
Click SAVE & CONTINUE.
Tab 4 - Authorised Representative
This tab is optional. If you have appointed a GST Practitioner or any other person to file returns on your behalf, enter their GSTP ID or details here.
If not applicable, skip this tab and click SAVE & CONTINUE.
Tab 5 - Principal Place of Business
This is the primary location from which business is conducted. Enter:
- Complete address with PIN code, building name, floor number, street, locality, city, state and district (use the MMI map to pin the exact location)
- Contact details: Office email and telephone number
- Nature of possession of premises: Own / Leased / Rented / Consent / Shared / Others
- Upload proof of address based on the nature of possession (electricity bill, rent agreement, property tax receipt, etc.)
- Nature of Business Activities: Select all activities applicable to your business (Factory, Warehouse, Retail Business, Wholesale Business, Service Provision, Office/Sales Office, Others, etc.)
Click SAVE & CONTINUE.
Tab 6 - Additional Places of Business
If your business operates from more than one location, add each additional place here. For each, provide the same details as the Principal Place of Business: address, nature of possession, proof, and nature of activities.
If you have only one business location, skip this tab and click SAVE & CONTINUE.
Tab 7 - Goods and Services
Enter the HSN (Harmonised System of Nomenclature) codes for goods you supply and SAC (Services Accounting Code) codes for services you provide. You can search by product name or code.
- Add up to 5 HSN codes for goods
- Add up to 5 SAC codes for services
Use the official HSN/SAC search tool at services.gst.gov.in/services/searchhsnsac to find the correct codes if you are unsure.
Click SAVE & CONTINUE.
Tab 8 - State Specific Information
This tab captures information required by specific states. The fields vary depending on the state you selected. Some states require additional local tax or professional tax registration details.
Fill in the applicable fields and click SAVE & CONTINUE.
Tab 9 - Aadhaar Authentication
This is a critical step. From the list displayed, select at least one person for Aadhaar authentication - typically the Primary Authorised Signatory (PAS) and/or the Promoter/Partner.
There are two modes of Aadhaar authentication:
Mode 1 - OTP-based Aadhaar Authentication (Standard)
- After selecting the person, an authentication link is sent to the mobile number and email ID linked with Aadhaar.
- Click the link and enter the OTP sent to your Aadhaar-linked mobile number to complete authentication.
- Once all selected persons complete authentication, ARN is generated.
Mode 2 - Biometric Aadhaar Authentication at GST Suvidha Kendra (GSK)
- This mode is applicable for Normal Taxpayers identified based on risk parameters by the GST system. It does not apply to all applicants.
- If biometric authentication is required, after Part B submission, you will receive an SMS and email asking you to visit the nearest GST Suvidha Kendra (GSK).
- Both the Promoter/Partner and the Primary Authorised Signatory must visit the GSK within 15 days of Part B submission for biometric authentication and document verification.
- If any required person fails to visit the GSK or the biometric authentication fails within 15 days, the ARN will not be generated, and the TRN will lapse.
- If Promoter/Partner and PAS are the same person, they must complete biometric authentication and document verification on the first visit.
Click SAVE & CONTINUE.
Tab 10 - Verification and Submission
- Check the Verification statement box to declare that all information provided is true and correct.
- Select the name of the Authorised Signatory from the dropdown.
- Enter the Place of making the declaration.
- Sign and submit using one of three methods:
- DSC (Digital Signature Certificate): PAN-based Class II or III DSC only. Required for companies and LLPs. Select your DSC from the emSigner pop-up.
- E-Sign (Aadhaar OTP): Signs using your Aadhaar-linked mobile OTP. Available through C-DAC and NSDL (both free). Only for authorised signatories who have an Aadhaar number.
- EVC (Electronic Verification Code): OTP sent to the registered mobile and email of the authorised signatory as entered in the GST portal.
- After signing, click the submit button. A success message is displayed.
- The Application Reference Number (ARN) is generated and sent to your registered email and mobile number within 15 minutes.
Important: Companies and LLPs must sign using DSC only. Proprietorships and partnerships can use E-Sign or EVC.
What Happens After Submission?
After ARN is generated, the following sequence takes place:
- Application status changes to Pending for Processing.
- The Jurisdictional Tax Officer reviews the application.
- If the officer is satisfied, they approve the application and issue the Registration Certificate (RC) with your GSTIN in Form GST REG-06.
- Your GSTIN and a temporary login password are sent to your registered email and mobile number.
- The Registration Certificate is available on your GST portal dashboard to view, download, and print.
- If the officer requires site verification, the application status changes to Site Verification Assigned. A Site Verification Officer visits your business premises.
- If the officer has queries, they issue a Show Cause Notice in Form GST REG-03. You must reply within 7 working days.
- If the application is rejected, an order in Form GST REG-05 is issued. You can file a fresh application after addressing the reason for rejection.
Application status colours on the portal:
- Green: Approved registration application
- Red: Rejected registration application
- Orange: Pending for processing or pending for order
How to Track GST Registration Application Status
You can track your application status in two ways:
Pre-login (using ARN):
- Go to www.gst.gov.in.
- Click Services > Track Application Status.
- Select Registration from the module dropdown.
- Enter your ARN and click SEARCH.
Post-login (using TRN or ARN):
- Log in using your GSTIN credentials once granted, or using TRN for pending applications.
- Go to Services > Registration > Track Application Status.
- Select submission period or enter ARN and click SEARCH.
The different status types are:
- Pending for Processing: Application submitted, pending with Tax Officer
- Site Verification Assigned: Application marked for site visit by Site Verification Officer
- Site Verification Completed: Site verification report submitted to Tax Officer
- Pending for Clarification: Tax Officer has issued a notice for clarification (SCN issued)
- Clarification Filed - Pending for Order: You replied to the SCN, officer yet to give order
- Clarification Not Filed - Pending for Order: You did not reply to SCN within time
- Approved: GSTIN issued, registration certificate available on dashboard
- Rejected: Application rejected by Tax Officer
- Withdrawn: Application withdrawn by you
Deemed Approval Rule
As per the official GST portal FAQ, if the Tax Officer does not take any action on your application within 30 calendar days of submission, the application is deemed approved and GSTIN is auto-generated. This protects applicants from indefinite delays.
If the Tax Officer raises an SCN within 30 days, you have 7 working days to reply. If the officer then does not take action within 7 working days of your reply, the application is again deemed approved.
What to Do If You Receive a Show Cause Notice (SCN)
If your application is put under query, the Tax Officer issues a Show Cause Notice in Form GST REG-03. To respond:
- Log in to www.gst.gov.in.
- Go to Services > Registration > Application for Filing Clarifications.
- Enter the Reference Number of the Notice or your ARN in the search field and click SEARCH.
- In the Modification in Registration Application field, select Yes if you want to modify the application or No if you only want to provide a clarification.
- Select Open Fields with Queries Raised through REG-03 to edit only the specific fields the officer has queried.
- Provide your clarification, upload supporting documents if required, and sign using DSC, E-Sign, or EVC.
- Submit. ARN is updated and the reply reaches the officer.
Important: You must reply within 7 working days of receiving the SCN. If you do not respond, the officer will proceed to reject the application.
GST Helpdesk: 1800-103-4786 (as listed on gst.gov.in)
Disclaimer: This article is for informational purposes only. All procedures are subject to change by GSTN, CBIC, and the Government of India. Always verify the latest process at gst.gov.in.
Add new comment