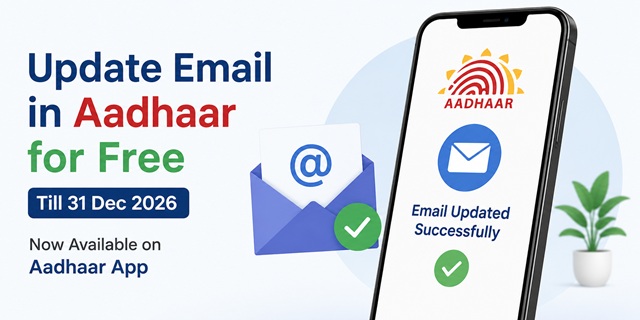
If your Aadhaar does not have a registered email ID or you want to change your existing one, you can now do it online without paying any fee. The Unique Identification Authority of India (UIDAI) has introduced a special facility that allows Aadhaar holders to add or update their email address free of cost through the official Aadhaar App from 1 July 2026 to 31 December 2026.
Unlike the earlier process, you no longer need to visit an Aadhaar Seva Kendra or enrolment centre for an email update. The entire process can be completed on your smartphone using mobile OTP, email OTP, and Face Authentication. After 31 December 2026, the regular UIDAI fee for demographic updates will become applicable again.
The Press Information Bureau (PIB) officially announced this facility on 3 July 2026. According to the release, more than 2.5 lakh Aadhaar holders updated their email ID through the Aadhaar App within just two days of the service becoming available, highlighting the strong public demand for this online facility.
Quick Facts at a Glance
| Detail | Information |
|---|---|
| Service Name | Aadhaar Email Add / Update |
| Available From | 1 July 2026 |
| Free Until | 31 December 2026 |
| Application Fee | Free during the offer period |
| Where to Apply | Official Aadhaar App (Android & iOS) |
| Visit to Aadhaar Centre | Not Required |
| Identity Verification | Mobile OTP + Face Authentication |
| Email Verification | Email OTP |
| Processing | Subject to UIDAI verification and validation |
| Official Announcement | PIB Release ID 2280645 (3 July 2026) |
| Implementing Authority | Unique Identification Authority of India (UIDAI) |
| Administrative Ministry | Ministry of Electronics and Information Technology (MeitY) |
Why You Should Add or Update Your Email in Aadhaar
Although linking an email address with Aadhaar is not mandatory, it is recommended by UIDAI because it provides an additional contact method for Aadhaar-related communication. A registered email can also make it easier to receive important updates and manage your Aadhaar services online.
- Receive important UIDAI communications: A registered email allows UIDAI to send important notifications and updates related to your Aadhaar whenever applicable.
- An additional contact method: If you temporarily lose access to your registered mobile number, your email can still serve as an alternate communication channel for certain Aadhaar-related updates.
- Convenient online service management: Many Aadhaar services are available digitally. Keeping your contact details up to date helps ensure your Aadhaar information remains current and accurate.
- Better account security: Keeping both your mobile number and email address updated with UIDAI helps you stay informed about your Aadhaar account and reduces the chances of missing important communications.
Things You Need Before Updating Your Aadhaar Email
Before you begin the email update process through the Aadhaar App, make sure you have the following:
- Your 12-digit Aadhaar number.
- The mobile number currently registered with your Aadhaar, as an OTP will be sent to it during login.
- The email address you want to add or update. Make sure you can access this inbox because an email OTP will be sent for verification.
- A smartphone with a working front camera to complete Face Authentication.
- A stable internet connection throughout the update process.
- The latest version of the official Aadhaar App installed on your Android or iPhone.
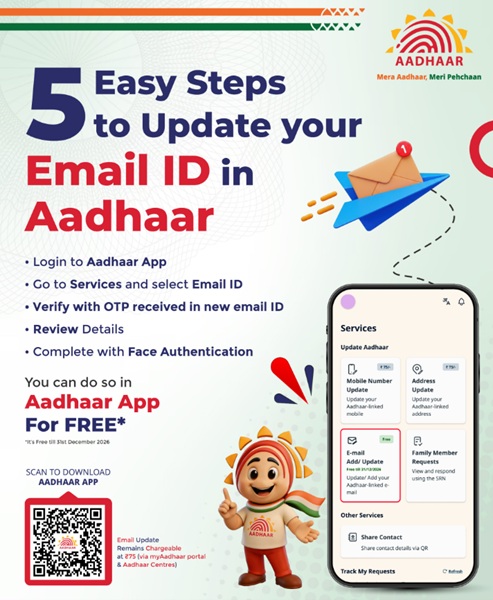
How to Add or Update Your Email ID in Aadhaar Using the Aadhaar App
UIDAI has introduced a dedicated option in the official Aadhaar App that allows Aadhaar holders to add a new email address or update an existing one without visiting an Aadhaar Seva Kendra. During the free service period, the entire process can be completed on your smartphone in just a few minutes.
Before you begin, make sure you have installed the latest version of the official Aadhaar App.
Download the Aadhaar App:
- Android: Google Play Store
- iPhone (iOS): Apple App Store
Step 1: Open the Aadhaar App and Sign In
Launch the Aadhaar App and enter your 12-digit Aadhaar number. Verify your identity by entering the OTP sent to your registered mobile number.
Step 2: Complete Face Authentication
After mobile verification, the app will ask you to complete Face Authentication. Follow the on-screen instructions and allow camera access if prompted.
Step 3: Open the Email Update Service
Once you reach the dashboard, open the Services section and select "E-mail Add/Update – Free till 31/12/2026".
Step 4: Enter Your Email Address
Type the email address that you want to link with your Aadhaar. Ensure the email ID is correct because a verification code will be sent to this address.
Step 5: Verify Your Email
Open your email inbox, retrieve the OTP received from UIDAI, and enter it in the Aadhaar App to verify ownership of the email address.
Step 6: Confirm Your Identity
To protect your Aadhaar details, the app performs another Face Authentication before accepting the request. Complete the verification as instructed.
Step 7: Submit the Request
After successful verification, submit your request. The Aadhaar App will display a confirmation message indicating that your email update request has been successfully received by UIDAI.
What Happens After You Submit the Request?
Submitting the request does not immediately update your Aadhaar records. Once your application reaches UIDAI, it undergoes verification and validation before the email address is added to your Aadhaar profile.
After the request is processed successfully, UIDAI will send a confirmation to your registered email address. If the update is still under processing, you can check the latest status through the Aadhaar App or by logging in to the My Aadhaar portal.
| Stage | Status |
|---|---|
| Request Submission | Instant through the Aadhaar App |
| UIDAI Verification | Processed after backend verification and validation |
| Email Update Confirmation | Sent after the request is successfully approved |
UIDAI has not announced a fixed processing timeline for email updates through the Aadhaar App. The request remains under verification until it is approved and reflected in your Aadhaar records.
What Happens After 31 December 2026?
The current free email update facility is available only until 31 December 2026. From 1 January 2027, UIDAI will discontinue this promotional offer, and the applicable charges prescribed by UIDAI for demographic updates will apply.
If you have been planning to register or change your email address in Aadhaar, completing the update before the deadline will help you take advantage of the free service.
Is It Mandatory to Link an Email Address with Aadhaar?
No. A registered email address is not mandatory for keeping your Aadhaar valid. Your Aadhaar remains fully functional even if no email is linked to it.
However, keeping your email address updated provides an additional communication channel for Aadhaar-related services and helps ensure that your contact information remains current with UIDAI.
Other Services Available Through the Aadhaar App
Besides email updates, the Aadhaar App offers several self-service facilities, allowing users to manage their Aadhaar details without visiting an Aadhaar Seva Kendra. According to the official PIB announcement, millions of users have already used the app for various Aadhaar services.
- Add or update your email ID.
- Update your mobile number.
- Update your address.
- Download e-Aadhaar.
- Order an Aadhaar PVC Card.
- Lock or unlock Aadhaar biometrics.
- View Aadhaar authentication history.
వ్యాఖ్యానించండి