Applying for an Aadhaar card requires a visit to an authorised Aadhaar Enrolment Centre because biometric details, your photograph, all 10 fingerprints, and both iris scans must be captured in person. You cannot apply for a new Aadhaar fully online. However, UIDAI provides an online appointment system so you can book your slot in advance and avoid long waiting times at the centre.
Aadhaar enrolment is completely free of cost. As per the official UIDAI website uidai.gov.in, over 66,000 Aadhaar Enrolment Centres operate across India through banks, post offices, BSNL offices, Common Service Centres, and dedicated Aadhaar Seva Kendras. You can visit any of these centres regardless of which state or district you live in.
Source: All information in this article is based on official UIDAI guidelines at uidai.gov.in.
Who Can Apply for Aadhaar
As per UIDAI, any resident of India can apply for Aadhaar. There is no age limit; even a newborn baby can be enrolled. The eligibility conditions are:
- Resident Indians: Any person who has lived in India for at least 182 days in the 12 months immediately before applying. This includes adults, senior citizens, children, and newborns.
- Children below 5 years (Baal Aadhaar): Enrolled with only a photograph, no fingerprints or iris scans at this age. A parent or guardian must be present and authenticate on behalf of the child.
- NRIs (Non-Resident Indians): NRIs are exempt from the 182-day residency condition. They can enrol at any authorised centre with a valid Indian passport.
- Foreign nationals: Persons of other nationalities who have lived in India for 182 days or more in the preceding 12 months can apply. A valid foreign passport and a valid Indian VISA or OCI card are required.
- Differently-abled individuals: Persons unable to provide fingerprints or iris scans due to injury, amputation, or medical condition can still enrol. The operator uses exception handling with supervisor authentication to complete the process.
Important: You should enrol only once. Multiple enrolments for the same person result in rejection of the duplicate applications due to UIDAI's biometric deduplication process.
Documents Required for Aadhaar Enrolment
UIDAI requires documents in four categories for enrolment. Read each carefully before visiting the centre. All documents must be submitted in their original the operator will return them after scanning.
1. Proof of Identity (PoI)
A PoI document must contain at least your name and photograph. Commonly accepted documents include:
- Passport
- PAN Card
- Voter ID (Election Photo Identity Card)
- Driving Licence
- Government-issued Photo ID Cards
- Ration Card with photograph
2. Proof of Address (PoA)
A PoA document must contain your name and address. Commonly accepted documents include:
- Passport
- Voter ID
- Driving Licence
- Bank Passbook or Bank Statement
- Water, electricity, or landline telephone bill not older than 3 months
- Ration Card
- Rental or lease agreement
3. Proof of Relationship (PoR) For Head of Family Based Enrolment
If you are enrolling a family member who does not have their own PoI and PoA documents, such as a child or elderly relative, the Head of Family (HoF) can introduce them. The HoF provides documents establishing the relationship, such as a ration card listing all family members, a birth certificate, or a marriage certificate.
4. Proof of Date of Birth (PDB)
Required when you want your exact date of birth (not just year) recorded in Aadhaar. Accepted documents include a birth certificate, a passport, or an SSLC/ matriculation certificate. If no PDB document is available, only the year of birth is recorded.
For Children Below 5 Years (Baal Aadhaar)
- Birth certificate is mandatory for children born on or after 01-10-2023
- Aadhaar numbers of both parents are required for Head of Family-based enrolment
- If one parent is unavailable, the other parent's Aadhaar and a reason for absence must be provided
- If neither parent is available, a legal guardian must authenticate and provide their Aadhaar number
- The address in the child's Aadhaar will match the address of the Head of Family (parent/guardian)
The complete official list of all acceptable documents is available at uidai.gov.in under "List of Supporting Documents."
Aadhaar Enrolment Fees
| Service | Fee | Notes |
|---|---|---|
| New Aadhaar Enrolment | Free | No charge for any resident enrolling for the first time |
| Baal Aadhaar (children below 5) | Free | Free enrolment for children |
| Biometric update at age 5 | Free | Mandatory update when child turns 5 |
| Biometric update at age 15 | Free | Mandatory update when child turns 15 |
| Demographic update (name, address, DOB, gender, mobile, email) | ₹50 | Per update request at enrolment centre |
| Biometric update (fingerprints, iris, photo) | ₹100 | Demographic update is free if done in the same visit |
| Aadhaar PVC Card order | ₹50 | Ordered online at myaadhaar.uidai.gov.in |
Note: UIDAI does not charge for new enrolment under any circumstances. If any operator demands payment for a new Aadhaar enrolment, report it immediately at the UIDAI toll-free helpline 1947.
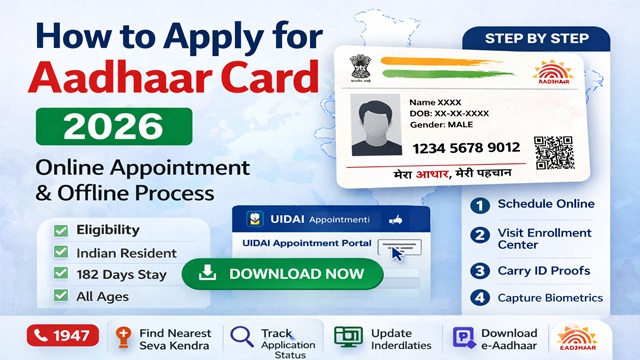
Step-by-Step Process to Apply for Aadhaar
Step 1: Locate Your Nearest Aadhaar Enrolment Centre
Find the nearest authorised centre using the Bhuvan Aadhaar portal at bhuvan-app3.nrsc.gov.in/aadhaar. Search by your state, district, or pin code. The portal lists all centres near you along with their type, address, and working hours. Centres are available in four categories: all enrolment including adults, all enrolment excluding adults, child enrolment only, and child enrolment with mobile update. Choose the one that fits your needs.
Step 2: Book an Appointment Online (Recommended)
Walk-ins are accepted at most centres, but booking an appointment in advance is strongly recommended to avoid long queues. To book an appointment, visit appointments.uidai.gov.in/bookappointment.aspx, select your city and preferred centre, choose "New Enrolment" as the service type, pick your preferred date and time slot, enter your name and mobile number, verify with OTP, and save or print the confirmation. Carry this confirmation slip to the centre on the day of your appointment.
Step 3: Visit the Centre with Your Documents
Carry your original documents for PoI and PoA. Do not carry photocopies; originals are required. The operator will scan them and return all documents to you after enrolment. If you are enrolling a child below 5, both parents and the child must be present. If enrolling through HoF method, the HoF must also be present to authenticate.
Step 4: Fill the Aadhaar Enrolment Form
At the centre, collect the Aadhaar Enrolment and Update Form. You can also download and pre-fill it from uidai.gov.in to save time at the centre. Fill in your name exactly as it appears in your PoI document. Write your complete address, date of birth, gender, and optionally your mobile number and email address. Mobile number is optional for resident Indians, but strongly recommended as it unlocks all OTP-based UIDAI services. For NRIs and foreign nationals, email is mandatory.
Step 5: Get Demographic and Biometric Data Captured
Hand the filled form and original documents to the operator. The operator captures your demographic data, name, date of birth, gender, and address in both English and your regional language. Then, biometric data is captured: your facial photograph, all 10 fingerprints using a fingerprint scanner, and both iris scans. For children below 5, only a photograph is taken; no fingerprints or iris scans at this age. Verify your details carefully on the screen before the operator finalises the submission.
Step 6: Review and Sign the Enrolment Form
Before the operator submits, check all your demographic details on the screen, especially your name, date of birth, and address. These must exactly match your documents. Do not sign until you are fully satisfied that the details are correct. Errors in name or date of birth require a separate correction request later, which costs ₹50. It is far easier to correct at this stage.
Step 7: Collect Your Enrolment ID (EID) Acknowledgement Slip
After successful submission, the operator gives you an acknowledgement slip. This slip contains your 14-digit Enrolment ID (EID) and the date and time of your enrolment. Keep this slip very carefully. You need the EID to track your Aadhaar status and to download your e-Aadhaar if you do not remember your Aadhaar number once it is generated. The operator also returns all your original documents at this point.
What Happens After Enrolment
After you leave the centre, UIDAI processes your application through several verification and deduplication checks before generating your Aadhaar number. Here is what happens:
- Verification: UIDAI verifies your demographic data and biometrics. For some enrolments, state government authorities may also conduct a verification before Aadhaar is generated.
- Deduplication: UIDAI's system checks whether your biometrics already exist in the database. If a match is found (duplicate enrolment), the new application is rejected to ensure each person has only one Aadhaar.
- Generation: Once all checks pass, your unique 12-digit Aadhaar number is generated. You receive an SMS on your registered mobile number if you provided one at enrolment.
- Physical card dispatch: UIDAI sends your physical Aadhaar letter by India Post to your registered address. You can track delivery using the dispatch reference number sent to your mobile.
- e-Aadhaar download: As soon as your Aadhaar is generated, you can download your e-Aadhaar for free from myaadhaar.uidai.gov.in. The e-Aadhaar is legally valid, you do not need to wait for the physical card.
How Long Does Aadhaar Take to Generate?
As per UIDAI, generation timelines differ by age group:
| Age Group | Normal Generation Time | Maximum Time |
|---|---|---|
| Children (0–18 years) | Up to 30 days | 90 days |
| Adults (18 years and above) | Up to 90 days | 180 days |
These timelines apply when the quality of enrolment data meets UIDAI standards, no duplicate biometric or demographic entry is found, and no technical issues arise during processing.
How to Check Aadhaar Application Status
You can track the status of your application at any time using your EID from the acknowledgement slip.
- Visit myaadhaar.uidai.gov.in/CheckAadhaarStatus
- Enter your 14-digit Enrolment ID and the date and time of enrolment printed on the slip
- Enter the captcha and click Check Status
- The portal shows whether your Aadhaar is under review, in process, generated, or dispatched
You can also check the status by SMS. Send UID STATUS followed by your EID to 51969 from your registered mobile number.
Special Cases
Enrolment Without Documents Introducer and Head of Family Method
If you do not have any standard PoI or PoA documents, UIDAI allows two alternative methods. Under the Introducer method, a designated UIDAI-authorised person introduces you at the enrolment centre and vouches for your identity and address. Under the Head of Family (HoF) method, a family member who already has Aadhaar introduces you by providing their Aadhaar number and biometric authentication, along with a document proving your relationship to them. Ask the operator at your nearest enrolment centre about the availability of these methods in your area.
Enrolment for Persons with Disabilities
UIDAI has an inclusive approach to enrolment. If you are unable to provide fingerprints due to injury, amputation, or a medical condition, only iris scans are collected. If you cannot provide any biometrics at all, the operator conducts enrolment through an exception process with supervisor authentication. All Aadhaar Seva Kendras are wheelchair-friendly and have provisions for elderly and specially-abled individuals.
Baal Aadhaar Mandatory Biometric Updates
Children enrolled below the age of 5 receive a blue-coloured Baal Aadhaar. Since fingerprints and iris scans are not captured at this age, UIDAI mandates biometric updates at two stages. When the child turns 5, they must visit an enrolment centre to provide all biometric fingerprints and iris. This is treated as a fresh enrolment, but the same Aadhaar number is retained. When the child turns 15, they must again furnish all biometrics, as the biometric data from age 5 needs updating. Both these updates are free of charge.
Things to Keep in Mind
- Enrol only once. Attempting to enrol multiple times results in all duplicate applications being rejected. If your first enrolment is rejected due to quality issues, UIDAI will notify you and ask you to re-enrol. Wait for that communication rather than enrolling again on your own.
- Carry only original documents. Photocopies are not accepted. The operator will scan and return all originals after enrolment.
- Make sure your name in the enrolment form matches your PoI document exactly. The name in Aadhaar is taken directly from your submitted document.
- Register your mobile number at enrolment, even though it is optional. Without a registered mobile number, you cannot use any OTP-based UIDAI service, including downloading your e-Aadhaar, completing eKYC, or updating details online.
- Photograph your EID slip immediately after receiving it and store it digitally. If you lose the paper slip, you still have the EID number to track your status.
- Use only official UIDAI centres found through uidai.gov.in or the Bhuvan portal. Do not trust unofficial agents or shops offering to enrol you for a fee. Aadhaar enrolment is always free.
Conclusion
Applying for Aadhaar is a straightforward, free process. Locate your nearest enrolment centre, book an appointment to avoid waiting, carry your original PoI and PoA documents, and complete biometric capture at the centre. Collect your EID acknowledgement slip before leaving and use it to track your application status at myaadhaar.uidai.gov.in. Once generated, download your e-Aadhaar immediately; it is legally valid, and you do not need to wait for the physical card by post.
Always use only official UIDAI platforms uidai.gov.in, myaadhaar.uidai.gov.in, and the Bhuvan portal for centre location. Never pay anyone for Aadhaar enrolment. New enrolment is always free.
Source: uidai.gov.in | myaadhaar.uidai.gov.in | Unique Identification Authority of India, Ministry of Electronics and Information Technology, Government of India.
Add new comment